


Hello, and welcome to the C&C Guild - the definitive resource for Command & Conquer modding. You can find a wide variety of articles and resources within this site and the forum to help you whether you're just new to the modding field, or even if you've been around a while longer. In addition, we also have a plethora of (hosted) mods which range from simple balancing patches to large-scale total conversions.
To log in to the site, please click "Log In" above and use your Revora Forums account. When logged in, you'll be able to contribute your own articles to the site. Further info can be found in the forums. Also, if you want to be hosted here yourself, give Revora's Hosting Portal a visit to send off an application to us. For anything else, details of how to contact us are in here. Thanks, and have fun.
~ The C&C Guild Staff
0 Project Phantom v.1.1 Update Released
Posted by Starkku on December 17, 2025 in Project Phantom News

Project Phantom v1.1 update is now out!
Download:

Additional downloads like music are available at: https://projectphantom.net/download
Overview of changes from 1.0
Full changelog available at: https://projectphant...changelog/#v1-1
• Significant number of bugfixes.
• Major balance changes to units & buildings, especially to Experimental Units.


• Tweaks and balance changes to support powers.


• Additional features to jet aircraft like support for guard & waypoint mode and new buildable jets for all three factions.


• Cleanup of mercenary faction arsenals and new additions.


• New and overhauled game lobby options.

• A new Challenge map to tackle.

• A number of new Standard maps to play on.

• Support for playing custom missions through the client.

• Chinese localization option.


And more! Read the full changelog on PP website for full list of changes.
Future
Project Phantom development will continue beyond version 1.1. Plan is to get first campaign missions out in the next non-patch release and address any bugs and major balance issues in patch release(s) much quicker than it took 1.1 to come out.
0 Project Phantom Development Update Summer 2025
Posted by Starkku on June 15, 2025 in Project Phantom News

Development is still under way for next version of Project Phantom, numbered 1.1, following the initial release from last September. It was initially scheduled to be released during last year but several factors have unfortunately contributed to it being delayed significantly beyond the initial planned release window. Below is some more info on the changes and additions that will be introduced in this version.
Artwork Updates


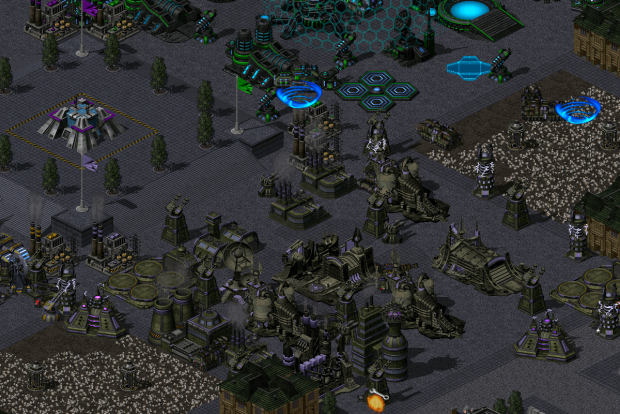
Some units and buildings, including Subjugator, Coalition Laser Cannon and Phantom Research Lab have received a facelift.
In addition those with keen eyes can notice some adjustments to offensive support powers in the preview for Research Lab, they now all have same warning animation (with some color differences) and sound.
There has also been some updated animations, particularly for muzzle effects on gun and cannon weapons of all types.
Experimental Unit Improvements
There have been balance changes to almost all experimental units as well as their associated support powers. Below is a sneak peek at some of the changes.
Experimental tech unlock options also no longer benefit from multiple factory build time bonus and can only be placed within fixed distance from a friendly Construction Yard.
Other Gameplay Additions & Changes
Jet Changes

Jet aircraft are now allowed to use waypoint and guard mode. Not all jets will be able to automatically pick targets in waypoint or guard mode, but those that do will scan nearby area automatically for them when in either. Unlike other types of units, guard mode is not persistent on aircraft, meaning that once assigned, the unit will return to idle mode upon returning to airfield or if there was no suitable target found when assigned to guard mode - this may change in future.
Jets also no longer self-repair while in air but repair at rate corresponding to rookie-level self-repairing on vehicles for free when docked.
Some may also notice there have been some additions to the factions' airforce.
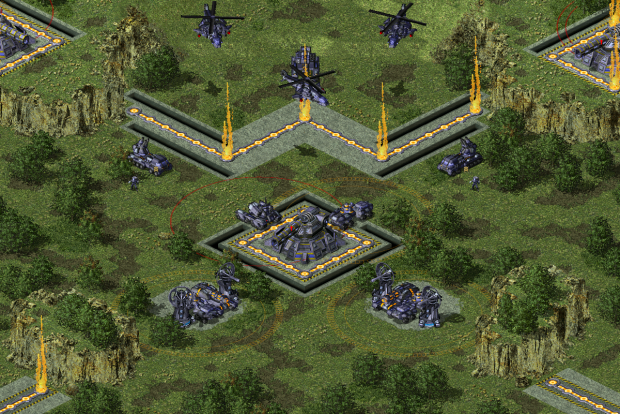
Tank Drop and Usurper Shock Tank
Tank Drop no longer drops Oppressor Tanks but a new Usurper Shock Tank with electricity-based weapon much like Shock Troopers or Shock Pylon. Usurper is more effective against infantry than Oppressor but performs considerably worse against buildings and base defenses - making Tank Drop less effective as a surprise base killing tool but potentially more effective for anti-unit harassment. Additionally all Dominion tier 1 vehicles - that is Oppressor, Tyrant and Usurper now share the destruction horde firepower bonus that was previously exclusive to Oppressor and the effect duration now replenishes for all stacks when new stacks are added to the effect. Usurper also gains a weapon range bonus near friendly Shock Pylons.
Usurper is not buildable except if reverse-engineered in Scavenger mode.
Mercenary Faction Additions & Improvements

Fist of Titans arsenal has had bit of a cleanup and facelift. Mercenary Motor Squad and Deliver Crocodile Tank/Vulture Copter have now been merged into one support called Mercenary Strike Force and Mercenary Troops now delivers some of the Fist of Titans infantry periodically at the Outpost free of charge. Savage is no longer trainable at the outpost due to being a mostly redundant pick over the main factions' basic infantry, but in exchange some of the vehicles have acquired new abilities.
Crimson Crown now uses similar Experimental Unit system as the main factions, offering two choices - the existing Blackout Signal Jammer that has been improved and the new Desecrator MLRS crowd control weapon. Both of these choices also unlock a new support power to use alongside the unit.
In addition, Crimson Contract has been split into two support powers with fixed unit loadouts, with the second one requiring a T3 laboratory and some Crimson Crown units have received tweaks to make them bit more interesting to use.
Excelsus Research Lab will now unlock a new buildable unit in form of Sentinel Utility Truck if a T3 laboratory is also owned. Sentinel can repair damaged vehicles & structures as well as boost armour strength of nearby base defenses and detect cloaked enemies.
In addition, Excelsus Research Lab itself can now be found on more maps.
Some general misc. improvements & balance changes
- Transports can now load in units without them having to queue up first - they will however still need to exit one by one.
- Credits generation rate for T4 structures and Oil Derricks has been reduced from 100 to 75 credits per 10 in-game seconds.
- Scout infantry attacks have been normalized and will now deal damage on same frame of their attack animations.
- Map reveal support powers now temporarily fully decloak enemies that are in the area of their activation.
Game Options Additions
There are now several new game options that can control availability of certain features in battle such as garrisons, tech defenses and support powers / superweapons.

Merc Alliance is a new 'fun'-type game option that enables players to pick a mercenary faction to choose at game start that permanently unlocks their technology for player's use for duration of the game - this choice cannot be changed later. Any support powers that would deliver units at the mercenary HQ building will instead deliver them at coordinates considered the player's base center.
New Maps
Mortarmouth Challenge pits players against Dominion commanders fielding large amount of artillery weapons, ranging from tech defenses that cannot be recaptured by players (including the brand new Artillery Bastion) to Marauders and Brimstones and even the fearsome Ironblight.
In addition, there are new skirmish/multiplayer maps.
Final Words
There is currently no set release date for the update, however it will be revealed once it is more certain that the planned release can be delivered in that time window. Currently, this is a rough outline of what you can expect. Many of the new features were enabled by either Phobos Engine Extension or a new version of the CnCNet spawner DLL using same technology as Phobos does.
- A large number of balance tweaks and bugfixes
- Changes to experimental units, to balance out more outstanding ones and make the less interesting ones more desirable choices
- Some new units and/or support powers across the factions, including new jet aircraft for all factions
- QoL improvements like improved jet aircraft behaviour, faster transport loading etc.
- Overhaul of mercenary faction arsenals & bonuses
- New and overhauled game lobby options
- 1 new Challenge map
- 12 new Standard skirmish maps.
- Updated version of World Altering Editor included, with bugfixes and new features
- Support for multiplayer save / loading (currently only one multiplayer game session is preserved at a time, may change in future)
- Built-in custom mission support in game client
Yes, you read that last one right.

Expect to hear and read more about the upcoming update in the near future.
0 D-day's 23rd Anniversary and rebirth
Posted by Mig Eater on June 6, 2025 in D-Day News
Its June 6th D-day, this day marks the 81st Anniversary of the Allied landings in Normandy, launching the liberation of France during World War 2. But this day is also the 23rd Anniversary of the D-day mod for Red Alert 2.
![]()
It has been quite some time since I last posted any updates for D-day (7 years in fact!). The lack of updates was mainly from being burnout from social media and online activity in general, for several years I didn't do anything online at all. I however continued my work on D-day during my time offline. I've added over 200 new units to the mod, along with new buildings and terrain. I also added a completely new country to D-day, which I'll post more about in a future update. I've also incorporated the Phobos and Kratos engine expansions into D-day, which I've used to add many new and exciting features and abilities to the mod.
I plan to start posting updates on D-day more regularly but, as you can imagine I have a huge backlog of new things to post about tho. To start things off I've updated the D-day website, the unit list of every country has been updated, with some sides having a few small changes and others some quite significant ones. For example the American Marine Corps sub-faction has been expanded and the British pre and post war units have been reworked.
New pages have been added for Poland, China, Sweden and Czechoslovakia too, so you can finally see some of their new units and what I have been mainly working on over the past few years.
![]()
![]()
![]()
![]()
Here is a preview of a few of the new units from these countries.
Polish PZL P.11

Chinese M4A4 Sherman

Swedish EMIL 58 "Kranvagn"

Czech 152mm ShKH-TVP

0 Project Phantom 1.0 Released
Posted by Starkku on September 5, 2024 in Project Phantom News

As of today, after a very long wait, initial release of Project Phantom is out.
Download at: https://projectphantom.net/download
If you're looking to discuss the mod, leave feedback, report a bug or a crash or looking for players to play with, join the Project Phantom Discord Server as well.
Features:
- 3 playable factions with full-fledged arsenals.
- Western Coalition: A well-rounded army with access to reinforcements and upgrades. Special technologies: EMP, Non-Absorbing Shield Generators
- Eurasian Dominion: Focus on heavily armoured vehicles and large area weapons. Special technologies: Radiation, Chaos, Mind Control
- Phantom Imperative: Mobile units with light armour, high firepower and expensive prices. Special technologies: Teleportation, Stealth, Absorbing Personal Shields
- 3 experimental tech unlocks per faction, that player is locked in for rest of the match after making a choice allowing them access to an experimental unit and a complementary support power.
- Capturable tech buildings and mercenary faction buildings that unlock additional, themed units & structures.
- Over 200 skirmish & multiplayer maps.
- Three players (human or AI) vs. AI challenge maps.
- One cooperative mission.
What's Next
For a while the focus will likely be on fixing any bugs found, possible balance tweaks etc. There will eventually be content expansions replacing the placeholder buildings currently used, add additional maps like challenges and also the long-awaited singleplayer missions.
0 2024 Status Update
Posted by Starkku on April 11, 2024 in Project Phantom News
It has been a while since I've last posted a formal update for this mod. Regardless, work on this project has continued even during silence and keeps going relatively strong, and I do have few things to share.
Website
Project Phantom website has been updated with a new layout. Many of the pages are still under construction, and I'll be sure to keep everyone updated when they go live.
Discord
For those who may have missed it, Project Phantom does have an official Discord server that can be used for discussing the modification, receiving updates regarding it first in the line and eventually it would hopefully serve as a multiplayer hub as well.
Showcases
A while back I posted an article about various UI / UX improvements in Project Phantom, be sure to check it out if you already have not.
There's also a new showcase video, showing off some units & buildings in Project Phantom. It can also be viewed on ModDB.
As mentioned prior, development has been going on relatively strong, regardless of occassional pauses and challenges. With that in mind, I have the following announcement to make.
Early access version of Project Phantom will be released during Summer 2024
Exact release date will be made known closer to launch
So what will be in this first release?
Good question. Right now, we are looking at the following set of features.
- Three new factions - Western Coalition, Eurasian Dominion and Phantom Imperative, with complete arsenals full of new units, buildings and support powers (albeit many buildings will use graphics that can be deemed as 'placeholders').
- Three 'mercenary factions' - Fist of Titans, Crimson Crown and Excelsus Group, that have capturable buildings that provide various support powers and units to players who capture them, alongside the classic set of neutral tech buildings including capturable base defences.
- A large number of new map props and other miscellaneous buildings.
- Three reworked terrain tile theaters, Temperate, Tundra & Desert, with significantly expanded tilesets from the original game, including fully integrated urban tilesets and a basic interior tileset.
- Around 160 standard skirmish/multiplayer maps, some old and some new.
- Island Combat game mode, which is constrained to maps with water-locked islands.
- Scavengers game mode, where you start with a Mobile War Factory and are required to collect powerup crates for units and funds - your factory can reverse-engineer any vehicles found (including technology trucks for aerial vehicles) to unlock them as buyable units.
- One scenario for Hold the Line game mode, where up to 4 players (human or AI) are pitted against waves of AI-controlled enemies that scale based on number players in game, with objective to protect a critical structure from the said enemies.
A preview of Crimson Crisis scenario, where players are tasked protecting an Energy Research Lab against waves of Crimson Crown units.
- Challenges game mode, where 2 players (human or AI) are pitted against three AI-controlled enemies in specific scenarios that have unique modifiers in play and odds stacked against the players. Initially Challenges mode is going to come with three scenarios, one against each of the factions.
A preview of one of the Challenges, called Thunderhill Challenge where players are challenged by the nigh-impenetrable defenses of a W.A.R.D research base.
- A single Cooperative mission, testing the waters out, where two Coalition commanders are tasked with eliminating a Dominion mining outpost.
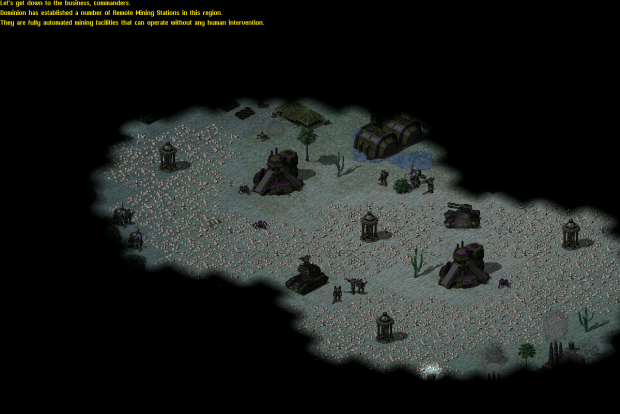
Preview of co-op mission Motherlode, where a small squad of Coalition forces is sent on an infiltration and elimination mission to a Dominion mining base.
- Various quality of life, bugfix and other engine improvements, courtesy of Ares Expansion DLL and Phobos Engine Extension.
- Full integration with the CnCNet client, allowing easy access to multiplayer games and easy download of mod updates.
- Bundled installation of two map editors, a version of the legacy FinalAlert 2 map editor as well as Rampastring's modern World Altering Editor.
- Installer software with compatibility with all releases of Yuri's Revenge.
I hope to have some more news to share about Project Phantom's development and the upcoming early access release in near future, but for now, I'm out.
0 C&C: Reloaded 2.5.1
Posted by FS-21 on December 27, 2023 in C&C:Reloaded News
C&C: Reloaded 2.5 released with focus in new single player missions and gameplay balance changes.
The most noticeable changes of this release are:
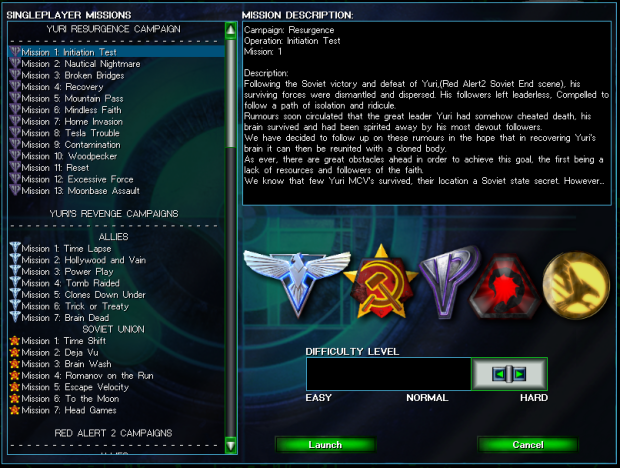
- Added a single player campaign for the Yuri faction. "Yuri Resurgence" contains 13 missions empowered with owr skirmish AI and new EVA voices for making the missions objectives more easy to understand (Special thanks to the original author Concolor1 for this great experience).
- Nod Centurion was replaced by the Avatar mech. 3 researchs will let the player the possibility to improve the new mech. Centurions will return in a future version.
![]()
- Silos game option mode is back! Last time it lasted few hours but now is the definitive return. Not only the refineries could work as slow strategic as in Tiberian Sun, Silos were added to all the factions, including the 3 RA2 factions:
- Updated Phobos library to the latest development snapshot with additional features.
- Updated CnC-Draw library to version 6.0.
- Added RA2 subtitles to brief & sidebar videos (English, Spanish & Russian).
- Updated Russian translation, specially the interface and the new Yuri campaign (special thanks to Green Eyesman).
- Now cannon weapons (usually fired by tanks) works like in Red Alert 1. This means that the units in movement will have less chance to be hit by a cannon projectile.
If somebody is interested to read the full changelog, please visit here:
https://forums.revor...ures-changelog/
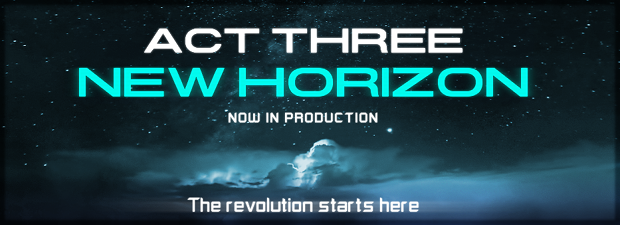
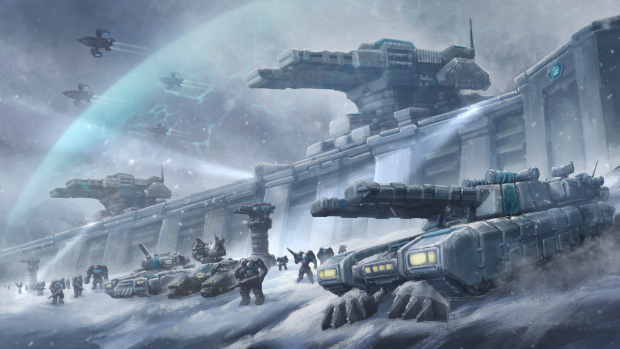
0 Mental Omega Act III now in development!
Posted by Speeder on December 7, 2023 in Mental Omega APYR News
![]()
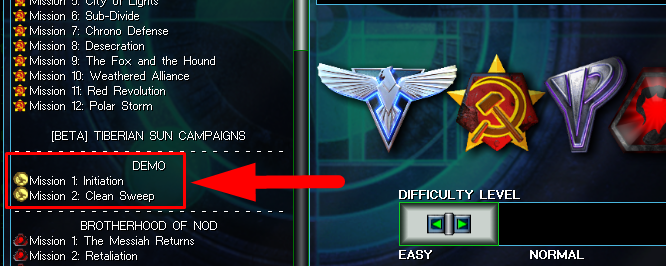
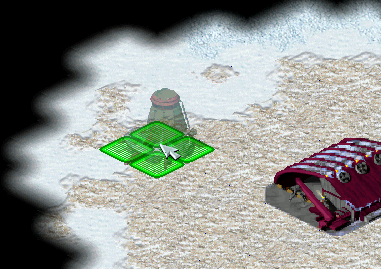
0 C&C: Reloaded 2.4.1
Posted by FS-21 on December 8, 2022 in C&C:Reloaded News
C&C: Reloaded 2.4.1 released with focus in AI improvements and gameplay balance changes.
The most noticeable changes of this release are:
- Updated Phobos library to the latest development snapshot with additional features.
- Updated Ares library to version 3.0p1.
- Updated CnC-Draw library to version 4.9.0.0.
- Replaced the old AI system for selecting AI Teams in multiplayer. Now AI can't cheat prerequisites.
- Added 2 new single player maps. These 2 are Tiberian Sun demo missions.
- Enabled a placement preview of the structures.
- Soviets now can choose between Tesla Coil or the Tesla Tower, But once you build one type you won't be able to build the alternative until you sell all the Teslas. Similar to Tech Center/Tech Lab logic.
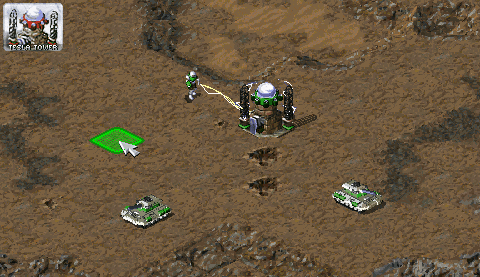
- Replaced the old GDI Orion ship. Now it uses the EMP cannon for forcing the submerged units to emerge and then attack with the cannon. Previously it was a support unit.
If somebody is interested to read the full changelog, please visit here:
https://forums.revor...ures-changelog/
0 Announcement about news posting.
Posted by predator_bg on September 5, 2022 in Contra News (eng)
As you may have noticed, there haven't been any news posts here for more than a year. Development has never stopped, we just stopped posting here.
So, follow us on ModDB and Discord instead for the latest stuff!
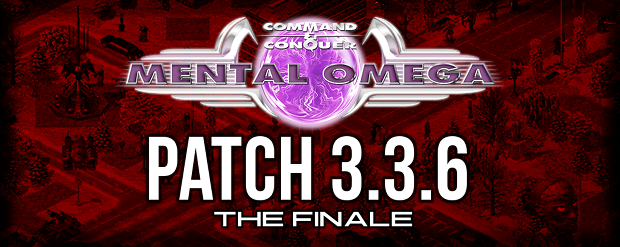
0 Mental Omega 3.3.6 is available for download!
Posted by Speeder on November 19, 2021 in Mental Omega APYR News

Yuri's Grand Kremlin Palace and the Black Guard
Yuri's Tower - The Mental Omega Device